Inspection Work Order Types
Objective: Gain an understanding of how to set up Inspection Routes in Brightly Assetic.
Brightly Assetic has a number of different Work Order Types to categorize maintenance in the Cloud Platform. The Preventative Maintenance (PM) - Inspection Work Order Type is used to categorise PM Work Orders that require an inspection activity. In addition to this, the Work Order Types PM - Periodic and CM - Corrective can also support inspections.
Inspections can be carried out on a single asset as a standalone Work Order, or on a series of assets when multiple Work Orders are generated from a Preventative Maintenance schedule. Work Order Type CM - Corrective can be used for Work Orders that were not created by a PM.
Brightly Assetic have recognised that there are two different data capture requirements for inspection tasks:
-
Some inspections require time and costs to be captured on each individual asset included on the inspection schedule. Eg. A scheduled level 1 or 2 inspection for a series of bridges, as a considerable amount of time would be spent on each bridge and this needs to be allocated to the correct asset (this level of detail justifies a separate Work Order to be completed for each bridge).
-
Other inspections require a date/time stamp to be captured to show that an inspection has taken place, but time and costs do not need to be allocated to each asset inspected. For example, a scheduled road or footpath inspection where an inspector would pass over many assets/segments with the aim of capturing that the inspection occurred rather than completing a Work Order for each asset/segment.
The standard Preventative Maintenance workflow suits above-mentioned Work Orders described in item 1. To assist with fulfilling the requirements of item 2, Assetic has implemented an Inspection Route tool for inspectors to use in the Brightly Assetic Mobile App.
Inspection Routes on the Mobile App
When performing an Inspection Work Order, the inspector will be able to track their inspection route while using an inspection layer as a guide to which assets require inspection. The inspector can pause and resume the inspection route tracker at any time, and stop the inspection tracker to sync the inspection route record back to the Cloud. The Inspection Work Order will stay open until the inspector completes the Work Order Execution details, which allows the inspection to span over a number of days.
If the inspector identifies any defects that need to be captured during the inspection, they can pause the inspection route tracker and create a new Work Order. If spatial data exists against assets in Assetic, the mobile app will be able to automatically select nearby assets based on the defect location indicated. The inspector is also able to select the asset for a Work Order by clicking a spatial object (if these have been created in Assetic), or by using the quick search tool. Any Work Orders created while on an inspection route will automatically include the Inspection Work Order ID populated in the Reference Work Order ID field.
Creating GeoJSON Inspection Layers
To enable the Inspection Routing feature for a Work Order, it needs to include at least one Route attachment. This file should include the assets or route that are to be followed during the inspection and needs to be in GeoJSON format. GeoJSON is an open standard format for representing geographical features. GeoJSON files can also include non-spatial attributes, but it is only the spatial objects that are used by the Assetic mobile app.
GeoJSON files can be easily created using QGIS, a free, open-source desktop GIS application. Other spatial vector data layers (e.g. SHP and TAB) can be opened in QGIS and saved as a GeoJSON file to make them compatible with the Assetic inspection route tool.
If inspections are carried out as part of a program, it is recommended that one GeoJSON file is created for each type of inspection e.g. if Major Roads are inspected every 6 months and Minor Roads inspected every 12 months, then separate GeoJSON files should be created for the Major Roads and Minor Roads. Assetic's PM schedule will ensure that the layers for both the Major and Minor Roads are displayed in the mobile app when these inspections coincidence.
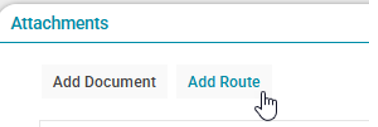
To upload a GeoJSON file, use the 'Add Route' button in the 'Attachments' section of the Job Plan.
Importing Spatial Objects Against Assets
In order for the inspector to have the app automatically select the nearest asset when they create a Work Order, and also give them the option to select an asset from the map, then the assets will need to include spatial data in the asset register. Spatial data can be imported against assets using the Data Exchange utility.
The following article provides information on preparing and importing spatial data into the asset register: Bulk Create Update Spatial Data
Inspector Permissions
To perform the inspection, inspectors would need to be assigned the Mnt Technician role as a minimum. To view assets spatially via the mobile app, inspectors need to be assigned as a resource against the relevant Asset Work Group(s) (note that each Work Group would also need to have the inspector's Craft configured to enable this functionality). To be able to create a new Work Order via the mobile app, the inspector would need to be configured as a Management User for the Work Groups they need to create Work Orders for.
Creating Inspection Route Work Orders
To create an Inspection Route Work Order, the Work Order must be one of the three Work Order Types that support inspections (PM - Inspection, PM - Periodic or CM - Corrective) and must also include a GeoJSON file attached using the Add Route option available under Attachments.
Creating Inspection Route Work Orders from a PM Schedule
For inspections that are recurrent or on a Criticality-based routine, it is prudent to set these up as Preventative Maintenance Schedules. This will ensure that Inspection Work Orders are generated and automatically pushed into the Operational Maintenance schedule as per the prescribed program.
To facilitate this, Job Plans should be created for each of the inspection activities for which a GeoJSON file has been created (e.g. one for Major Roads and one for Minor Roads). The relevant GeoJSON file will need to be attached to the Job Plan using the Add Route option.
Next, a Preventative Maintenance schedule should be created for the overall inspection (e.g. Road Inspection Schedule), and the relevant Job Plans added at the required repeat frequency (e.g. a Major Road Inspection at 6-month intervals, and a Minor Road inspection at 12-month intervals). For the inspection routing functionality to work as intended, it is recommended that only a single asset is selected for the PM schedule (it works well to attach the asset that the inspection will be commenced at, as this will allow the inspector to view the inspection starting point on the mobile app).
Viewing Inspection Results
Each time the inspector stops the inspection route on the mobile app, the route they have followed will automatically sync back to the Cloud as a GeoJSON file, in the documents tab of the Work Order. The GeoJSON file can be viewed online at http://geojson.io/ or added as a layer to a GIS application (note that QGIS allows viewing of GeoJSON files). The GeoJSON file contains the date and time stamps at each GPS point captured as the inspector created the route. When this is overlayed on asset data, users can visualise when a particular asset was inspected.
